Active eCommerce CMS Features, Review and documentation
Active eCommerce CMS is a robust and comprehensive content management system specifically designed for e-commerce websites.
 Innovate
Active eCommerce CMS is a robust and comprehensive content management system specifically designed for e-commerce websites. It offers a wide range of powerful features and tools that empower businesses to create and manage their online stores with ease. With Active eCommerce CMS, you can establish a secure and user-friendly e-commerce platform that caters to your unique business needs.
In this blog post, we will dive deep into the incredible features, conduct a detailed review, and provide you with all the documentation needed to make your eCommerce journey an absolute breeze. Whether you are an aspiring business owner or a seasoned entrepreneur, get ready to explore the world of Active eCommerce CMS like never before.
Overview of Active eCommerce CMS
Active eCommerce CMS is a complete open source eCommerce solution for managing your online store. It provides a user-friendly way to manage your products, customers, orders, and checkout process. Active eCommerce CMS is built on the Laravel PHP framework and offers a wide range of features to choose from.
Key Features of Active eCommerce CMS:
Active eCommerce CMS offers a wide range of key features that empower businesses to create, manage, and optimize their e-commerce stores effectively. Some of the key features of Active eCommerce CMS include:
1. Product Management: Active eCommerce CMS provides a comprehensive product management system, allowing businesses to add, edit, and organize their products effortlessly. Businesses can define attributes, set pricing options, manage inventory, and showcase product images to attract and engage customers.
2. Order Management: The CMS offers a streamlined order management system that enables businesses to track and process orders efficiently. Businesses can view order details, update order statuses, manage shipping and delivery, and generate invoices, ensuring a smooth and hassle-free order fulfillment process.
3. Payment Gateways: Active eCommerce CMS supports integration with multiple payment gateways, providing businesses with a wide range of secure payment options for their customers. Whether it's PayPal, Stripe, SSLCOMMERZ, Razorpay, instamojo, n-genius, Vogue Pay, Paystack, iyzico, paystack, Payhere, Payfast, Flutterwave, bkash, Nagad, amarpay, authorize net, mercado, Payku, Paytm, toyyibpay or other popular payment providers, businesses can configure and manage these gateways seamlessly.
4. Coupon and Discount Management: Businesses can implement effective marketing strategies using the coupon and discount management feature of Active eCommerce CMS. They can create customized discount codes, set expiration dates, define usage limits, and apply them to specific products or categories, encouraging customers to make purchases and boosting sales.
5. Responsive Design: Active eCommerce CMS ensures a responsive and mobile-friendly design for online stores. The interface is optimized to provide a seamless user experience across different devices and screen sizes. This feature enhances customer engagement, improves user satisfaction, and increases conversion rates.
6. SEO-Friendly: The CMS is designed with SEO (Search Engine Optimization) in mind, providing businesses with tools and features to optimize their online stores for better search engine visibility. This includes customizable meta tags, URL structures, and other SEO-friendly options to improve organic traffic and rankings.
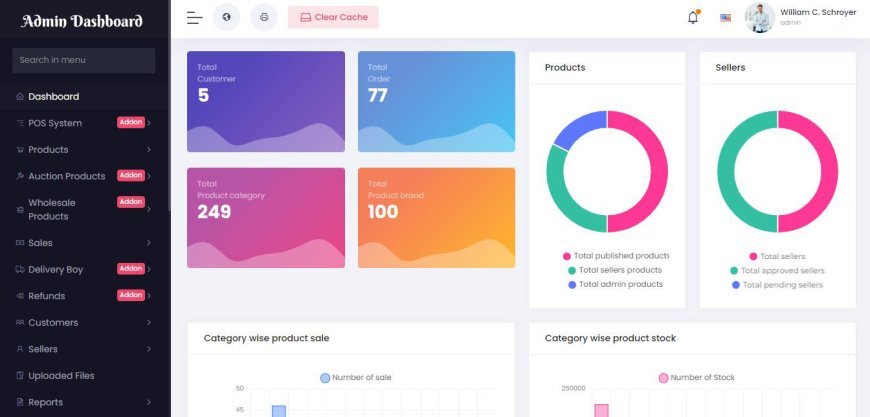
7. Analytics and Reporting: Active eCommerce CMS offers built-in analytics and reporting features to track and analyze various aspects of the online store's performance. Businesses can access data on sales, customer behavior, popular products, and more, allowing them to make informed decisions and optimize their strategies.
8. Multilingual and Multicurrency Support: Businesses operating globally can benefit from Active eCommerce CMS's multilingual and multicurrency support. It allows businesses to create localized versions of their stores, targeting customers in different regions and offering a personalized shopping experience.
9. Social Media Integration: The CMS seamlessly integrates with popular social media platforms, enabling businesses to leverage social media marketing. Businesses can integrate social media sharing buttons, connect their store with social media profiles, and drive traffic and sales through social media channels.
10. Extensibility and Customization: Active eCommerce CMS offers extensibility and customization options, allowing businesses to tailor their online stores to their specific needs. The CMS supports various themes, plugins, and extensions, providing flexibility and scalability for businesses to grow and adapt over time.
These key features of Active eCommerce CMS provide businesses with the necessary tools and functionalities to establish a successful e-commerce presence and effectively manage their online stores.
Installation & Upgrade
What are the Server Requirements to activate the script?
To install the script, the minimum server requirements are:
- Php version 8.0+
- MySQL 10.0+
- mod_rewrite Apache
- BCMath PHP Extension
- Ctype PHP Extension
- JSON PHP Extension
- Mbstring PHP Extension
- OpenSSL PHP Extension
- PDO PHP Extension
- Tokenizer PHP Extension
- XML PHP Extension
- ZipArchive Extension
Need Active eCommerce CMS with Installation and setup services? click here.
Installation guide
- Extract the downloaded .zip file from codecanyon on your PC.
- Upload the Install.zip file to your server public_html or any other directory you intend to run the script.
- Extract the zip file in that directory.
- Create a new database from your server MySQL database.
- Create a DB user to the database and link that database to the DB user.
- First, hit your site URL and it will automatically take you to the installation.
- Click on the Start Installation Process.
- You will get the Checking File Permission page. If everything is ok then click on Go to the next step.
- Now you need to set Database Host, Database Name, Database Username, Database Password, and click Continue.
- Now you need to import the SQL file.
- Now fill up the information on your website and click Continue.
- Click on Go to Home/ Login to the admin panel.
Upgrade to Latest Version
- Extract the downloaded file from Code Canyon.
- There you will get a zipped folder named ‘updates.zip’. Upload that to the root directory on your server where your previous version is running. Unzip that updates.zip file by selecting “Extract here”.
- Now reload the home page and click on ‘Update Now’.
- It’s Done!
- The full system has been updated with a single click.
How to Set up the Header part?
From admin panel navigation Click on Website setup > Header
- Header Logo: Upload Header logo
- Show Language Switcher? : Click on button to on/off
- Show Currency Switcher? : Click on button to on/off
- Enable sticky header? : Click on button to on/off
- Insert Topbar Banner, Topbar Banner Link, Helpline number, Edit or add Header Nav Menu.
- Then click on the Update button.
How to Set up the Footer part
From admin panel navigation Click on Website Setup > Footer
- Footer logo- Insert Footer logo
- Add Description- Insert description
- Play Store Link
- App Store Link
- Contact Info Widget- Insert
- Contact address
- Contact Phone
- Contact email
- Link Widget One- Insert
- Title- Useful links
- Links- Admin can add links, also can edit or delete.
- Copyright Widget- Insert Copyright Text
- Social Link Widget
- Payment Methods Widget- Upload files of payment method
How to Set up the Home pages part?
- Home slider: Select multiple images for the top slider section. Also, add, edit and delete options are available there. And also can add links
- Today's Deal: Add today's deal banner and also you can input products background color. And click on update.
- Home Banner 1: Add Home banner-1 & the maximum number is 3. And click on update.
- Home Banner 2: Select Home banner-2 & the maximum number is 3. And click on update.
- Auction Banner: You can add an auction banner.
- Coupon Section: From this part you can add/edit background color, title and subtitle. Click on update.
- Home Categories: By clicking on the “add new” button admin can create this section category-wise. And click on update.
- Classified Banner 3: Select classified banner-3 & the maximum number is 3. And click on update.
- Top Brands (Max 12): Select Maximum of 12 Brands for the sections. And click on update.
How to Set up the General part?
For General settings. Follow the below steps:
- Log in as an Admin
- Go to Website set up > appearance
- Frontend Website Name: Write website name
- Site Motto: Write your website motto.
- Site Icon: Select your own icon.
- Website Base Color: Select Website Base Color. (Hex Color Code)
- Website Base Hover Color: Select Website Base Hover Color (Hex Color Code)
- Insert Customer Login page image, Customer Register page image, Seller Login page background, Delivery boy login page background, Flash Deal banner large & also you can insert flash deal banner small. And click on update.
- Global Seo
- Meta Title- Fill up meta title.
- Meta Description- Fill up the section of meta description
- Keywords- Input keywords.
- Meta Image- Upload meta image.
- And click on update
- Cookies Agreement
- Insert Cookies Agreement Text
- Enable/disable Show Cookies Agreement
- Website Popup
- Enable/disable Show website popup?
- insert Popup content ○ you can enable/disable Show Subscriber form?
- And click on update
- Custom Script
- you can insert Header custom script - before and Footer custom script - before
- And click on update
How to configure payment methods?
To configure them follow the steps:
- Log in to the admin panel.
- From the navigation, go to Setup And Configuration -> Features Activation.
- Scroll down to the Payment Related section.
- Switch on by clicking the switcher of the methods which you want to activate.
- Then again from navigation, Setup and Configurations -> Payment method.
- Insert necessary Information of the methods.
The documentation provided by Active eCommerce CMS serves as a valuable resource for users, whether they are beginners or experienced e-commerce professionals. It offers clear and comprehensive instructions, allowing users to leverage the full potential of Active eCommerce CMS and effectively manage their e-commerce stores.